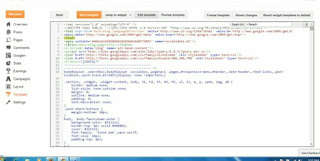
The blogger default template most times lack some awesome features like the read which you will have to be add the read more manually to every post using the jump break tab above, the reason why I recommend you to use this read automatically is because is one of the best way to make revenue from your blog why? because it enables more clicks on your blog.
I have received many complains and request from my friends and blog readers consigning this feature on their blog which in one way might be missing.The automatic read more enables your blog to look more professional and also it reduce the length of post displayed to every interested viewer to click for more.
Below are going to give some little steps on how to add the read more automatically to your blog without stress, just follow it carefully.
Step 1
First you need to visit your blogger dashboard and then select your preferred blog which you will like to work on.
Step 2
After clicking on the blog then move your mouse down to the "Template " tab and click on it >>>> "Edit HTML".

Step 3
Click on any part of the HTML and then press CTRL+F on your keyboard and the search for the below code
<head/>
Step 4
Now your will have to paste this code after the <head/> tag
<script type='text/javascript'>
summary_noimg = 300;
summary_img = 300;
img_thumb_height = 120;
img_thumb_width = 120;
</script>
<script type='text/javascript'>
//<![CDATA[
function removeHtmlTag(strx,chop){
if(strx.indexOf("<")!=-1)
{
var s = strx.split("<");
for(var i=0;i<s.length;i++){
if(s[i].indexOf(">")!=-1){
s[i] = s[i].substring(s[i].indexOf(">")+1,s[i].length);
}
}
strx = s.join("");
}
chop = (chop < strx.length-1) ? chop : strx.length-2;
while(strx.charAt(chop-1)!=' ' && strx.indexOf(' ',chop)!=-1) chop++;
strx = strx.substring(0,chop-1);
return strx+'...';
}
function createSummaryAndThumb(pID){
var div = document.getElementById(pID);
var imgtag = "";
var img = div.getElementsByTagName("img");
var summ = summary_noimg;
if(img.length>=1) {
imgtag = '<span style="float:left; padding:0px 10px 5px 0px;"><img src="'+img[0].src+'" width="'+img_thumb_width+'px" height="'+img_thumb_height+'px"/></span>';
summ = summary_img;
}
var summary = imgtag + '<div>' + removeHtmlTag(div.innerHTML,summ) + '</div>';
div.innerHTML = summary;
}
//]]>
</script>
EDIT
summary_img = 330 => if you want to display 420 characters in any post with image you can insert your preferred number.
img_thumb_height = 90 => This tag will determine the width of image thumbnail displayed.
img_thumb_width = 90 =>This tag will determine the width of image thumbnail displayed.
summary_noimg = 420 => if you want to display 420 characters in any post without image you can insert your preferred number.
Step 5
Now press CTRL+F on your keyboard and the search for the below code again
<data:post.body/>
Step 6
Now replace the above code with this one below
<b:if cond='data:blog.pageType != "static_page"'>
<b:if cond='data:blog.pageType != "item"'>
<div expr:id='"summary" + data:post.id'><data:post.body/></div>
<script type='text/javascript'>createSummaryAndThumb("summary<data:post.id/>");</script>
<div class='readmore-wrap'>
<span class='rmlink' style='font-weight:bold;padding:5px;float:right;text-align:right;'><a expr:href='data:post.url'>Read More</a></span>
</div>
</b:if>
</b:if>
<b:if cond='data:blog.pageType == "item"'><data:post.body/></b:if>
<b:if cond='data:blog.pageType == "static_page"'><data:post.body/></b:if>
Step 7
Finally "save" the template and the visit or preview your blog.
Don't forget to drop a comment and share this post thanks


No comments:
Post a Comment
We Love Comments